The Boer Wars
Part 3: The Wars The fighting didn't start right away. It officially began on Dec. 16, 1880, when Boer insurgents fired on U.K. positions at Potchefstroom. By that time, the Boers had declared themselves independent from the U.K. Four days after the first shots were fired, the Boers had success in destroying a U.K. convoy at Bronkhorstspruit. Next, Boer forces besieged U.K. garrisons at various positions around the Transvaal. 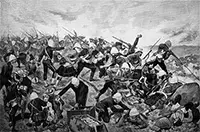
The Boers had the upper hand, inflicting varying amounts of damage on the defenders, but didn't find real success until the Battle of Laing's Nek, on Jan. 28, 1881. It was meant to be a U.K. counterpunch, but the Boer forces repulsed the attack and held their position and then, a week later, nearly annihilated a U.K. garrison at Schuinshoogte. One dramatic highlight for the insurgents was the Battle of Majuba Hill, on Feb., 27, 1881, when a concerted Boer attack resulted in the storming of a hill and the forced removal of the U.K. defenders atop that hill. The U.K. government, under Prime Minister William Gladstone, had had enough, and the two sides signed a truce, on March 6. A peace treaty came just 17 days later, and the Transvaal was again a Boer self-governing entity. As other European powers continued to develop colonies in Africa, the Boers solidified their hold on the Transvaal, which they officially called the South African Republic; at the same time, many other Dutch colonies disbanded. 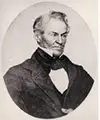
In 1852, on the Pardekraal farm in Krugersdorp, a Welsh mineralogist named John Henry Davis (left) discovered gold. He won an audience with President Andrie Pretorius, who swore Davis to secrecy and further ordered him to leave the area. Davis was paid handsomely for his gold, which went into the possession of the Transvaal Treasury. That wasn't the end of it. Another gold enthusiast, a veteran of the California Gold Rush named Pieter Jacob Marais, found gold on the Jukskei River and then on the Crocodile River. The government's reception to Marais's news was a bit different, in that he was sworn to secrecy but then also granted permission to keep looking for gold. He found slices of the precious metal in the Swars River and in the Sand River, but his finds were not major and he ended up leaving the South African Republic as well. It was in June 1884 that the dam began to break. Prospector Jan Gerrit Bantjes found the first hint of a large deposit of gold in the Witwatersrand region. This opened the floodgates, and the knowledge that gold was there for the taking was public. Prospectors from around the world descended on the area, swelling the population and beginning a permanent settlement that is now Johannesburg. 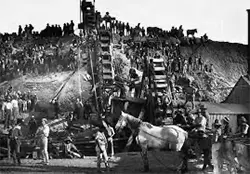
South African Republic President Paul Kruger foresaw trouble with so many people flooding the countryside, searching for gold, and he and his government instituted a new series of taxes designed to slow the gold-seeking efforts and the overall migration. An incensed Cecil Rhodes, on behalf of the U.K. government, decided to seize the gold fields for queen and country by approving what came to be known as the Jameson Raid, an attack on Boer possessions designed to foment a rebellion that would overthrow the government in favor of the U.K. A group of several men under Sir Leander Starr Jameson in late December 1895 made the attempt and failed disastrously. Many of his men were captured, branded as prisoners, and handed over to the U.K. government for punishment. Word of the raid and its aftermath spread to Europe. The Boers found a supporter in the German leader, Kaiser Wilhelm II, who sent Kruger a telegram offering congratulations. In 1897, the Orange Free State and the South African Republic signed an alliance, exchanging weapons and a commitment of mutual self-defense. A decade before the gold rush, a diamond rush had occurred in neighboring Kimberley, and the U.K. population had swelled under an influx of diamond-seekers. That larger population was still around when word of the discovery of gold in the South African Republic became public knowledge. In addition, although the amount of gold to be mined proved to be significant, the ability of the Boer government to support such an industry was slight and so the leaders decided to employ a number of outsiders to do what was needed economically and industrially. A majority of the non-Boers living in the South African Republic were of British origin, either from the U.K. itself or from U.K. colonies nearby. As their numbers grew, they spoke out more and more for protections against what they saw as the Boer government's increasingly divisive policies. The Boers, on the other hand, made decisions that they thought would maintain their hereditary advantage and ensure that they wouldn't lose control of the land that they had worked for several generations. Relations between the two powers were cordial at best when gold was discovered. The prosecution of the Jameson Raid proved to the Boer government that the U.K. could not be trusted. Talks in June 1899 failed to resolve differences between the two entities, and things looked grim. After another attempt to gain nominal control over the South African Republic, President Kruger gave the U.K. 48 hours, from October 9, to send all troops away from the borders of both the South African Republic and the Orange Free State. The U.K. government refused to do so, and the Boers declared war on the U.K. 
Boer troops numbered more than 33,000 in total; by contrast, the U.K. number was about 13,000. Seeking an early advantage, Boer forces attacked Cape Colony and Natal, both areas held by the U.K., and made quick work of the defending garrisons at Kimberley, Ladysmith, and Mafeking. The first serious engagement of the war was at Talana Hill, on October 20. The U.K. encampment withstood a Boer artillery bombardment from the summit, then U.K. forces took the summit after a fierce counterattack. Still having the momentum, Boer forces used their larger numbers to support a number of sieges, of various supply centers. Their efforts succeeded in pinning U.K. troops down for months and served to deplete the resources of the towns besieged; however, the lack of movement over open terrain allowed the defenders time to rest and replenish and, more importantly, time for reinforcements to arrive from the home country. 
The fresh arrivals went on the attack, shelling Boer positions around the besieged areas. However, the besieging armies turned to defensive maneuvers based in trenches to protect their positions. As well, the Boer forces had the advantage of weapons that were more modern than their enemy's. In one week in December, Boer forces scored a handful of significant victories, including the devastation of the Battle of Colenso, which killed or wounded nearly 900 U.K. soldiers and claimed 10 big guns for the Boer side. In response to the Boer guerrilla operations, U.K. troops resorted to a "scorched earth" policy in some areas, burning homes and crops so that guerrila soldiers could not take them. Another key strategy of those U.K. forces was the use of blockhouses, to protect supply routes and bridges. 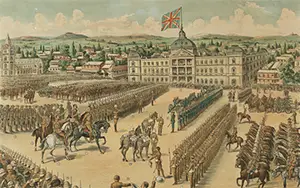
The response from the U.K. was to send even larger numbers of troops, in the end totaling the largest amount ever sent out of the country. The new troops didn't fare any better than their predecessors the first few times out; but in February, the tide began to turn. At Paardeberg and elsewhere, U.K. troops and strategies proved victorious. They had always had the numbers; those numbers were finally beginning to throw their weight around. Field Marshal Lord Roberts and his men took the Orange Free State capital, Bloemfontein, on March 13. After another handful of hard-won victories, the U.K. forces on June 5 seized Pretoria, the capital of the South African Republic. That was not the end of the war, however. Enterprising Boers moved their base of operations in the Orange Free State to Kroonstad and embarked on a guerrilla campaign, scoring some significant hits on U.K. supply and communication lines. This hit-and-run strategy carried the Boers through their continued refusal to surrender. Even though the 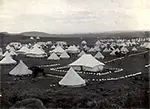
The Second Boer War is also notable for the use of concentration camps. It was not the first use of such means of dealing with prisoners of war, but it was the largest up to that time. U.K. forces built more than 100 tented camps. Conditions therein were notoriously poor, and deaths in the camps approached figures of those killed in the fighting. First page > Background > Page 1, 2, 3 |
|
Social Studies for Kids
copyright 2002–2024
David White


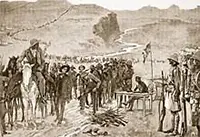 U.K. troops controlled both capitals and much territory, the war continued. Guerrilla actions targeted troops, resulting in pitched battles. Weeks became months became years, with no end in sight. More reinforcements arrived from London. It was in March 1902, at Rooiwal, that those reinforcements achieved their ultimate goal. Two months later, the last Boer fighters surrendered. A treaty that month sealed the peace and declared both former Boer states as part of the British Empire.
